Selecting Entries for Wait Conditions
To select entries for wait conditions
- Add a Route Entry to User, Route Entry to Group, or Route Entry to Folder activity to your Workflow Definition by dragging it from the Toolbox Pane and dropping it in the Designer Pane.
- Select the activity in the Designer Pane.
- Under Routing Options in the Properties Pane, click any of the icons to open the Routing Activity Options dialog box.
- Select the Wait Conditions tab.
- Click No condition set. Click here to create one. More information.
- Define for which entry these conditions must be met for the workflow to continue. From the
 top drop-down menu, select one of the following.
- Input entry: The wait conditions must be satisfied for the entry specified in the Entry property box. More information.
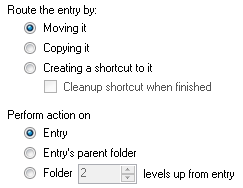
- Routed Entry: The wait conditions must be satisfied for the routed copy of, or shortcut to, the input entry as
 defined in the activity's Action tab. (If you chose to move the input entry, the routed entry is the same as the input entry.)
 - Routing Folder: The wait conditions must be met for the folder the routed entry is inside.
Example: Bob wants to route shortcuts of all incoming resumes to the applicants' folders. When an applicant's folder also contains an entry named Recommendations, he wants the workflow to continue. In this situation, Bob selects to Route the entry by Creating a shortcut to it and to Perform action on Entry in the Action tab. In the Wait Condition tab, he selects Routing Folder and specifies that the folder must contain an entry named Recommendations for the workflow to continue.

